DEBWrite Manual
How to obtain a DEBWrite account
- go to DEBWrite registration
- fill in the form → click register
- in reply you will receive login and password (for free)
- with given credentials, go here and log in
Part 1 – defining a structure of dictionary
Create new dictionary
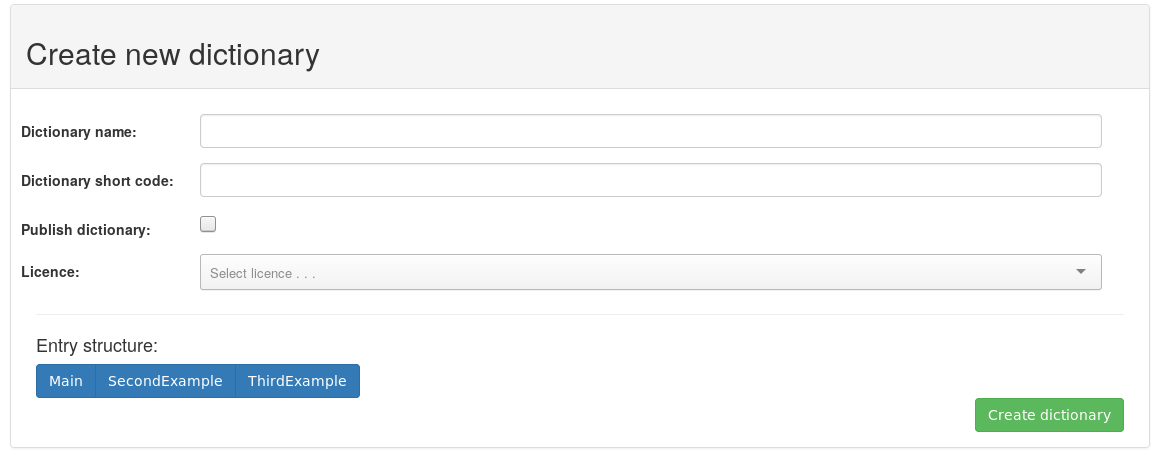
click Create new dictionary → type a name and code → click Create dictionary
At first, it is necessary to type a name of your dictionary (of your choice) and a dictionary short code which is set automatically by default, but you can specify it if you want to. Keep in mind that this code has to be unique for each dictionary, while names can happen to be the same. In addition, you can check the Publish dictionary box (it can be done later as well) and set a licence for the dictionary (it is not necessary now but without a licence you can not edit created entries). You can set up a structure of entries now, or leave it for later. When you are ready, click the Create dictionary button.
So, how can you define a structure of entries? Under Entry structure you can find a list of the most popular templates (e.g. explanatory dictionary, terminological d., multilingual terminological d.). Pick one and adjust it to your needs (more about it here).
Edit dictionary
When you click Create dictionary, Edit dictionary page is displayed.
Here, you can:
- change the name of your dictionary, its licence and publish it
- edit structure of entries
- add collaborating users and their permissions
- select an output template for the dictionary
Entry structure
At first, you should choose one of the offered templates under Entry structure. Then, you can modify it, or save it as it is.
Each element consists of these items:
| Element | this field represents an identifier for each part of the entry, used in XML format |
| Label | verbose description of the element |
| Headword | the primary key of the entry, only one can be specified; defines the most important component, it is the property you type in a search box |
| Multiple | a toggle allowing the element to be used multiple times inside one entry (e.g. for meaning, if the main entry has more than one) |
| Required | means the element must be specified (always keep checked for the headword element) |
| Type | defines an element format; it is a drop-down list containing options (text, number, file, etc.) described below |
On the bottom right corner of each element, there is a bin icon which would eventually delete the element when pressed.
To add a new element, click the Add element at the bottom of the template.
List of possible options for Type:
| text | is used for one word (headword, pronunciation, synonym, etc.) or short text like grammatical information |
| textarea | is suitable for a long text area like definition and usage examples |
| number | if an entry has more meanings, you can number them |
| container | this element carries other element(s) listed below, there shouldn’t be any information written in the element itself |
| file | using type of element, you can upload a file |
| select | creates a box where you can write some options (e.g. in element part of speech – noun, verb, ...); these are offered when creating an entry |
| crossreference | you can link the entry with another one, from other dictionary to which you have an access |
At the bottom, there is Edit dictionary button which you should use to SAVE your entry structure.

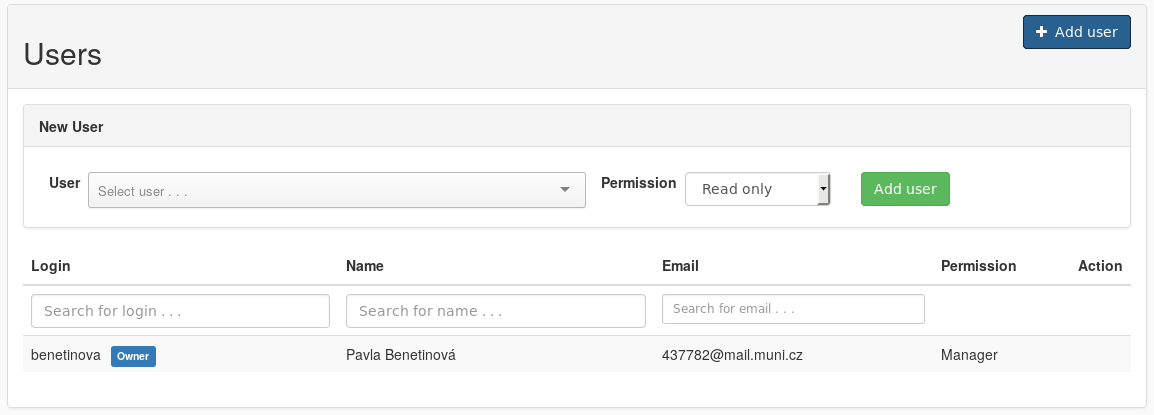
Users
Right under the Entry structure section, you can find a section where you manage your users, collaborators, on the dictionary. To add a user, click + Add user button. Two drop-down lists appear. One with users which you can add. The other with permissions which you can give them.
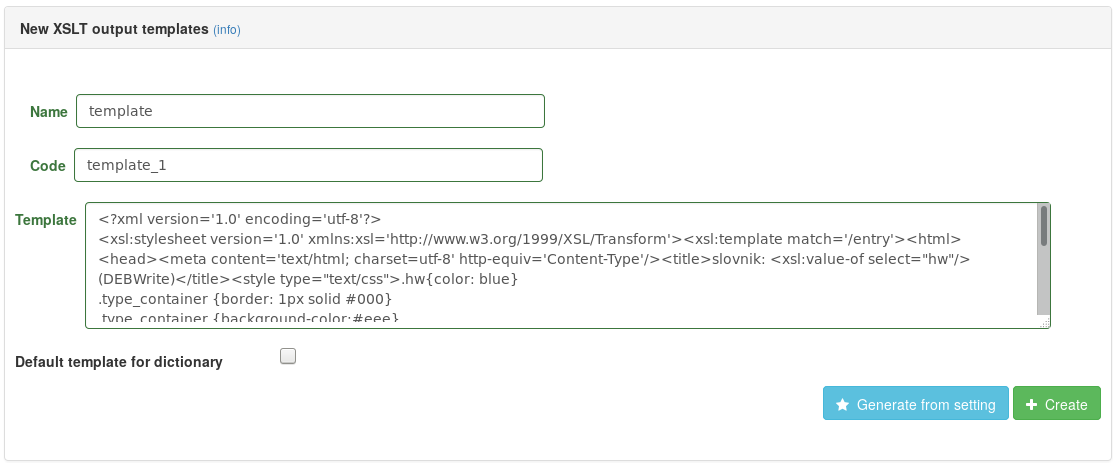
XSLT output templates
Here, you can set how entries in your dictionary are presented. Without this template your entries would be displayed only in XML format. Click + Add XSLT template button. Type a name of the template. The easiest way how to create the output template is to click on the Generate from setting button. Then, you can edit the generated code or click + Create and you are done.
A guide, how to write your own template in XSLT, can be found here.
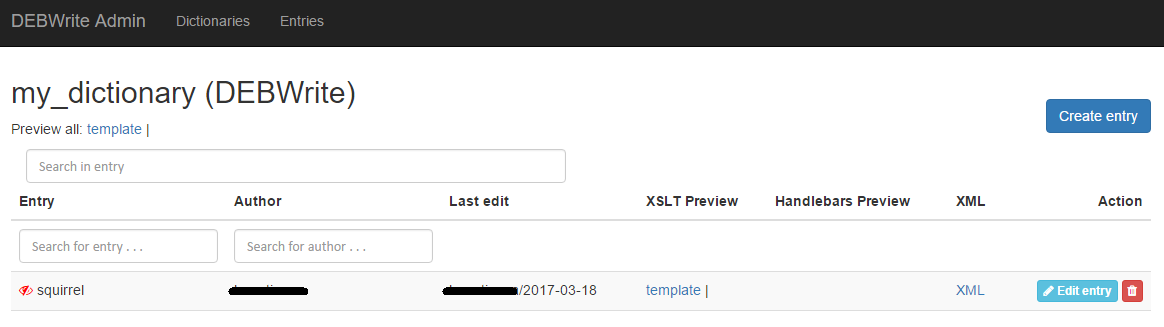
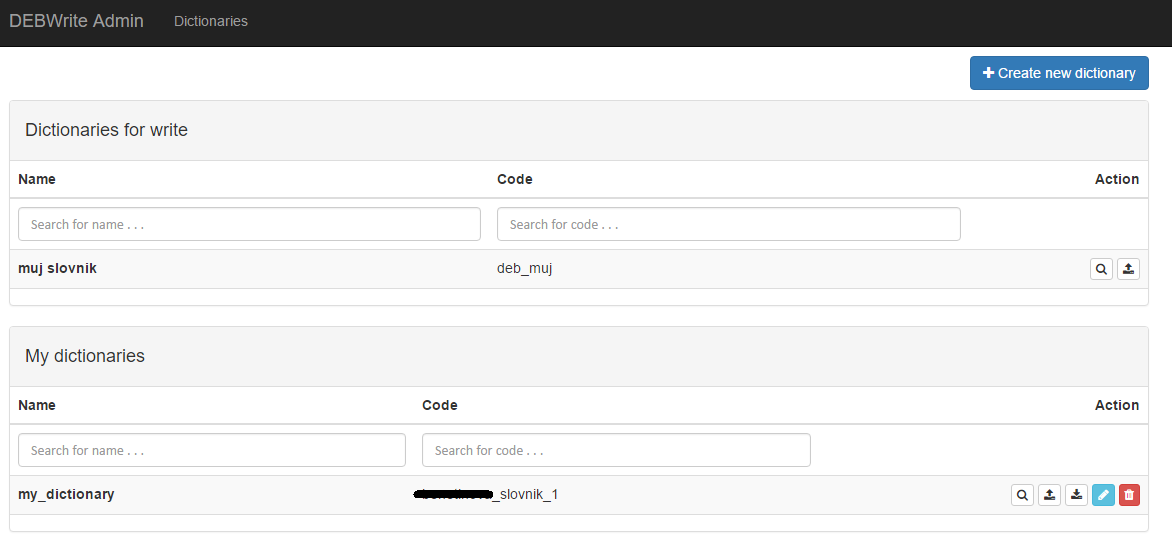
Dictionaries main page
Click on DEBWrite Admin or Dictionaries button on the top. You can see a list of your dictionaries (those you have created or are accessible to you). For each dictionary a list of actions (based on your permissions) is displayed. You can browse dictionary, export XML, import XML, edit settings and remove dictionary.
Part 2 – creating entries
In order to proceed in creating entries, you need to guide yourself to the entries editor page. This can be done by:
- On the Dictionaries main page, select the dictionary you want to work with and click the Browse dictionary action (magnifier icon)
- If you are located on the Edit dictionary page, in the top menu there you can find the Entries button. By clicking on it, you are taken to the entries editor
On this page, you can search in entries you have created and create new ones.
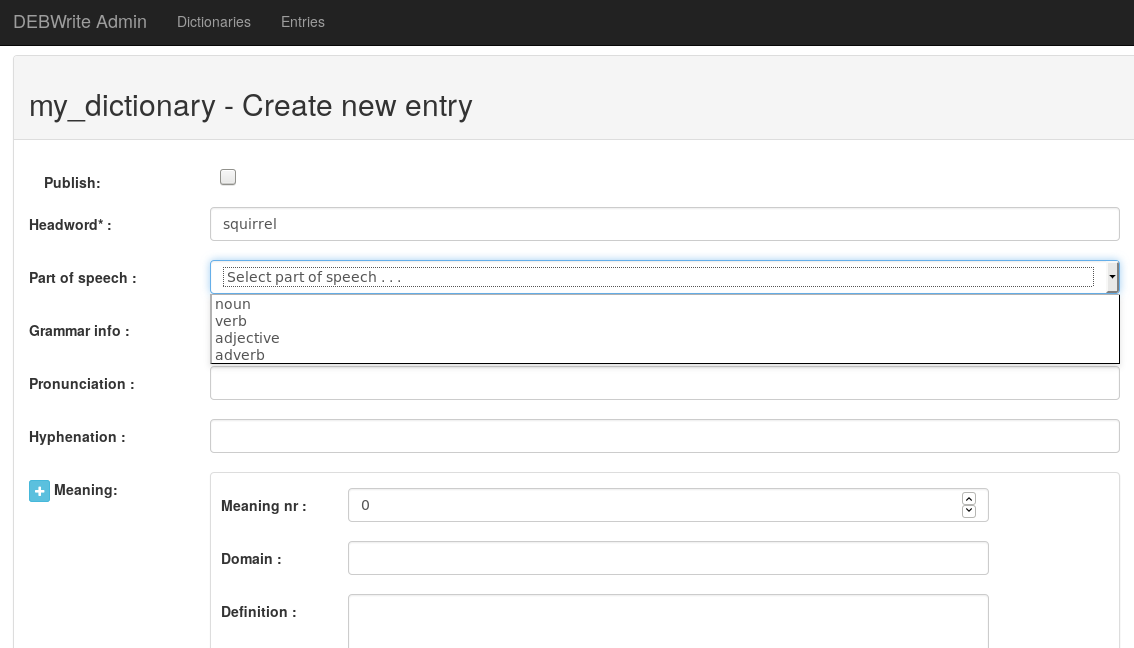
Create new entry
Click Create entry button and Create new entry page displays. It is a form listing all the entry elements according to the structure you have defined before (in the Entry structure part).
If the element has the multiple attribute set, a + character is shown in front of the line. Click on it and the item duplicates. At the end of the line, there is also a - button, which would delete the item. Items marked with * are required.
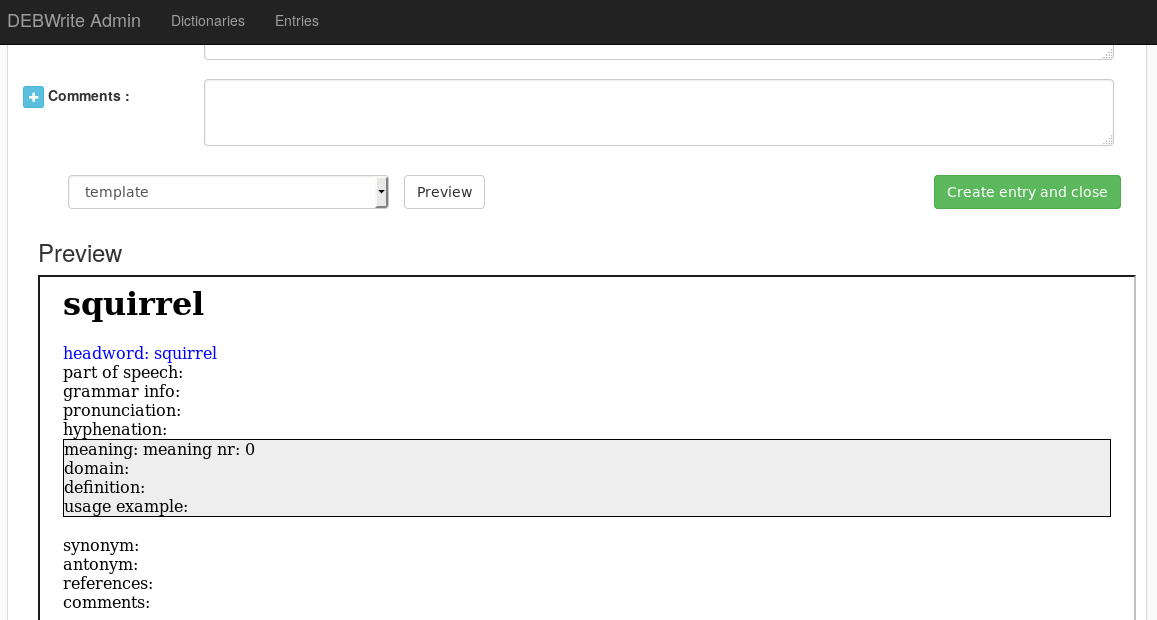
At the bottom of the form, there is a preview. Under the preview, you can set its format (XML or your XSLT template).
When you are done, at the top of the form, you can select Publish. Do not forget to click on the Create entry and
You can edit and delete created entries as well. When you browse your dictionary, under each entry, you can see edit entry and remove entry buttons. Do not forget that it is not possible, if you have not set a licence for the dictionary in Create new dictionary part.